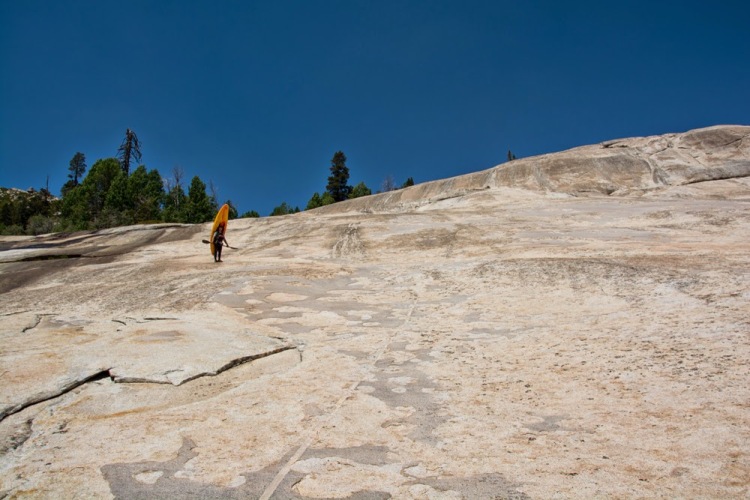
It has been a long time since I saw some of the first photos of the Santo Domingo. Ben Stookesberry and Jesse Combs on their epic first descent of what is probably the steepest kayaking section of the world.
There’s nothing similar to see the photos of a place than to experience it by yourself, so when I heard that River Roots (Rush & Rafa) where planning a mission down there I was really excited to go with them and be part of it.
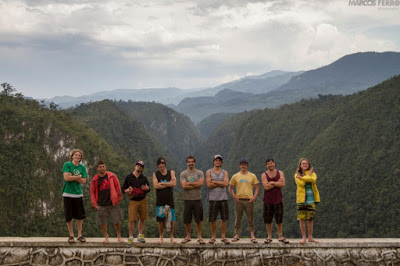
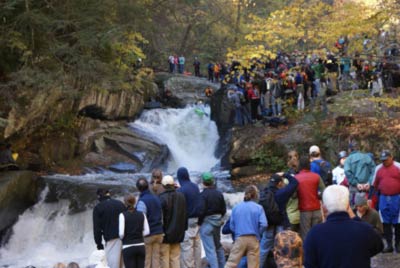
The crew posing with the Santo domingo valley behind! Such a wild and beautiful place!
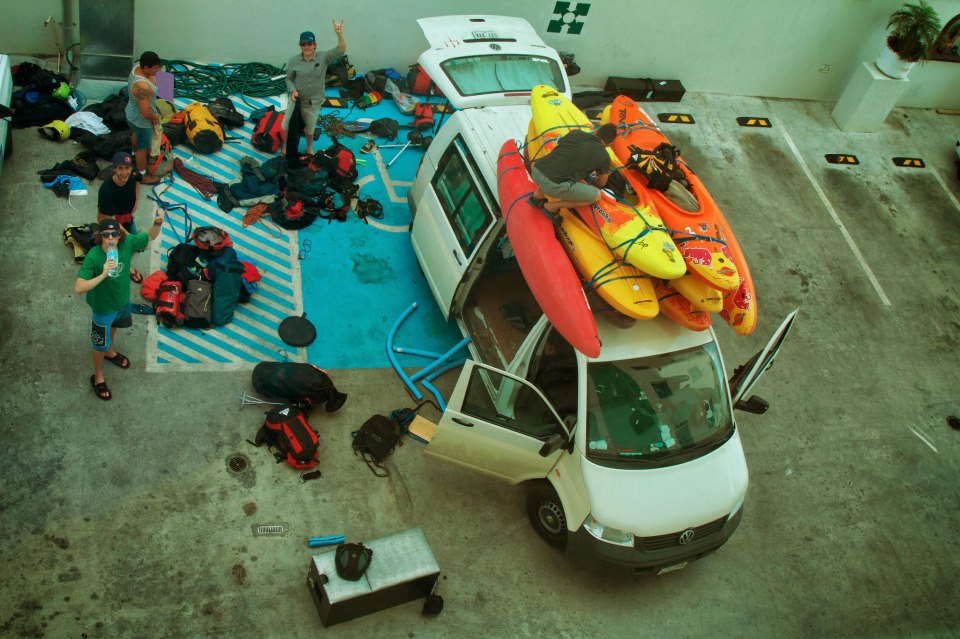
Van from hell cleaning day!
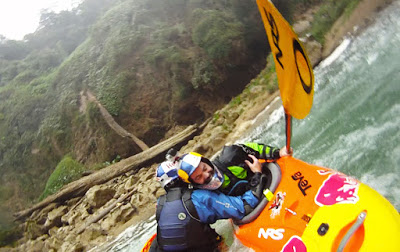
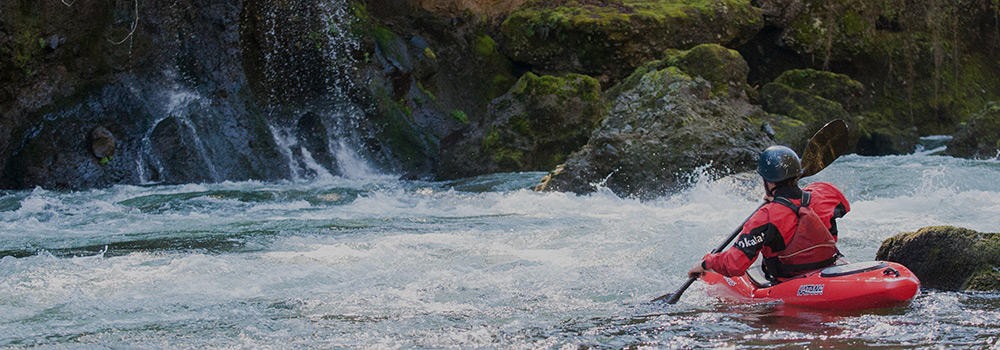
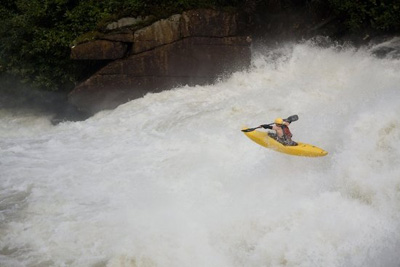
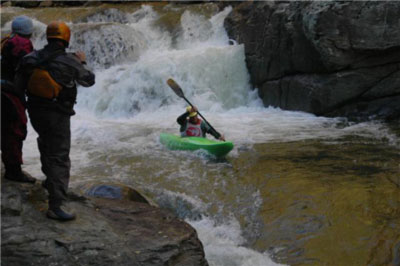
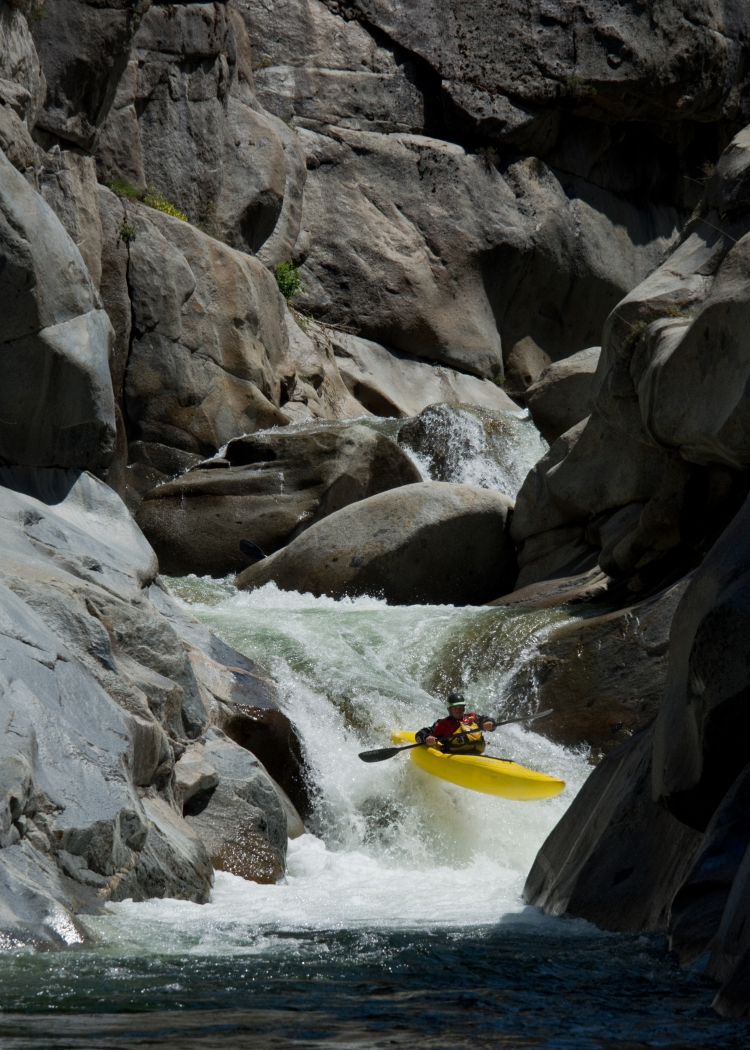
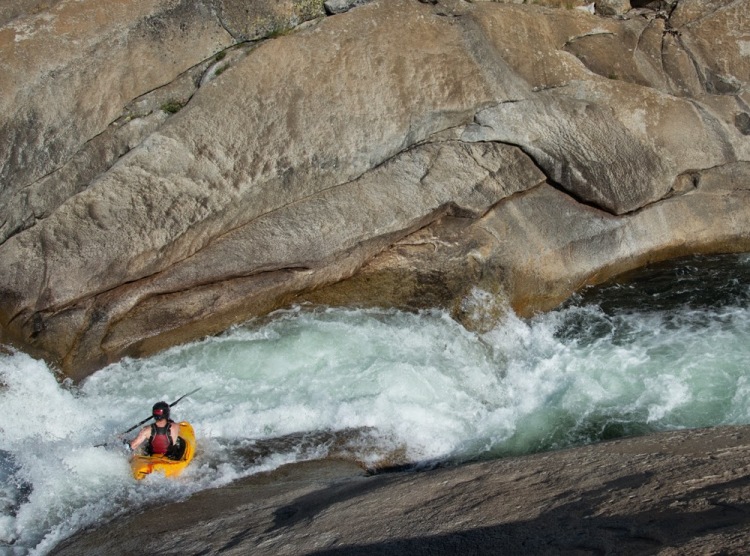
We have done 3 rounds down the Sto. Domingo and they have been totally awesome. The put-in is under a bridge so you don’t even have to walk to get in, there’s a few class IV rapids before getting to the steep section starts. Then you got 2 options, you either run “Angel wings” or make a rappel down and start before the “Dome”.
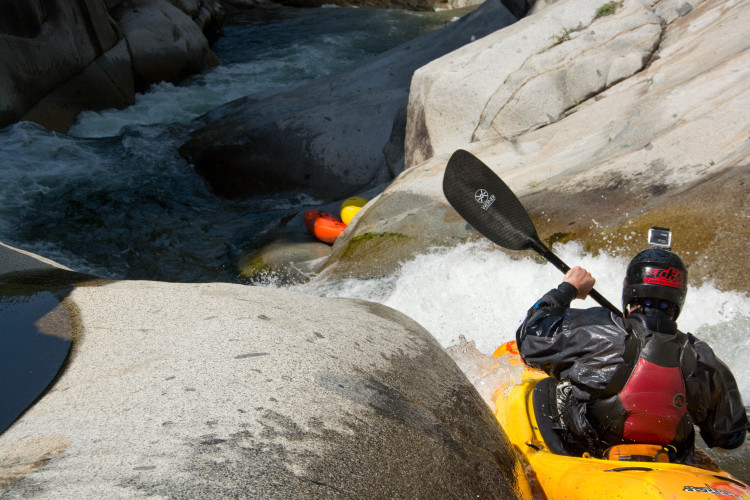
The problem with those drops is that they’re so close one from each other that In case of getting injured or getting ejected on the first one you will probably end up swimming the next rapid wich will be insane and would hurt a lot…
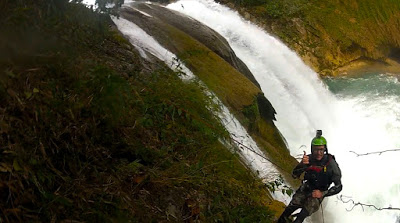
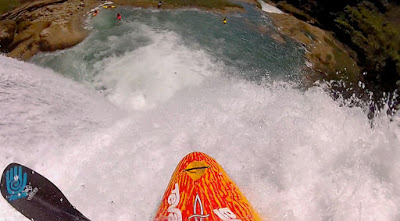
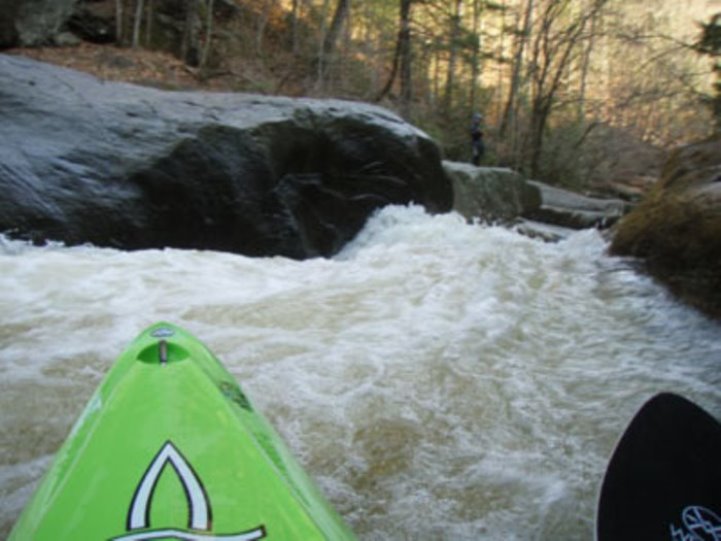
GoPro shot of the Dome
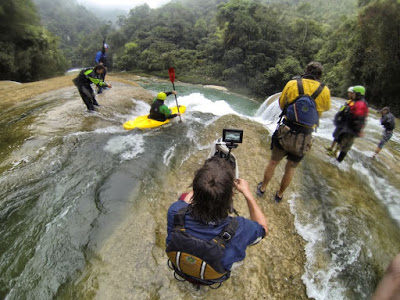
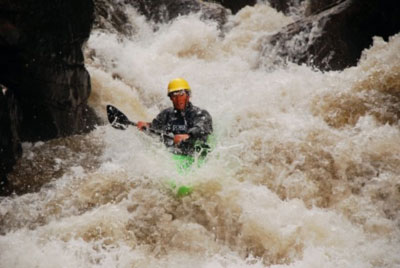
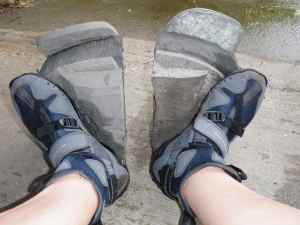
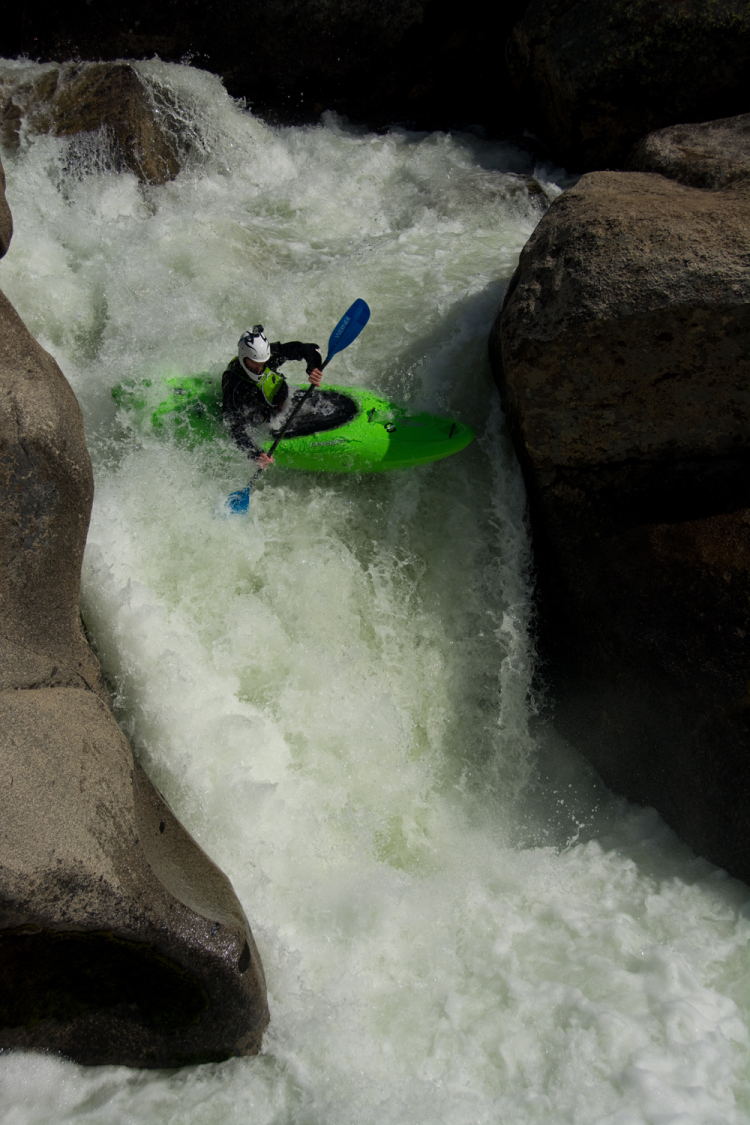
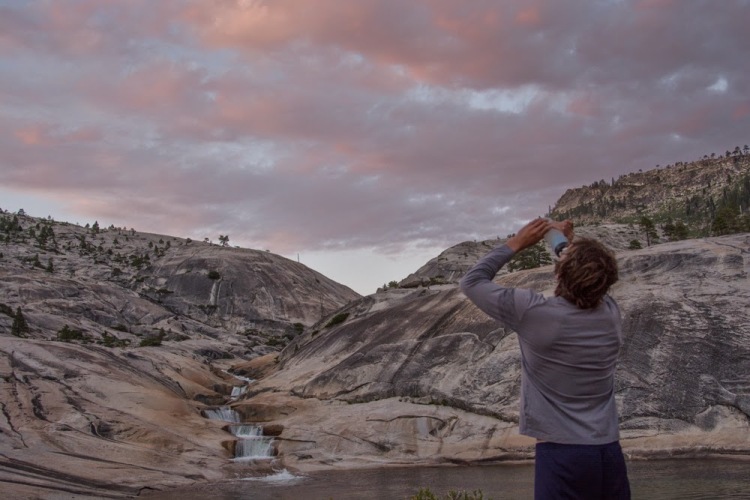
all stoked at the bottom!!
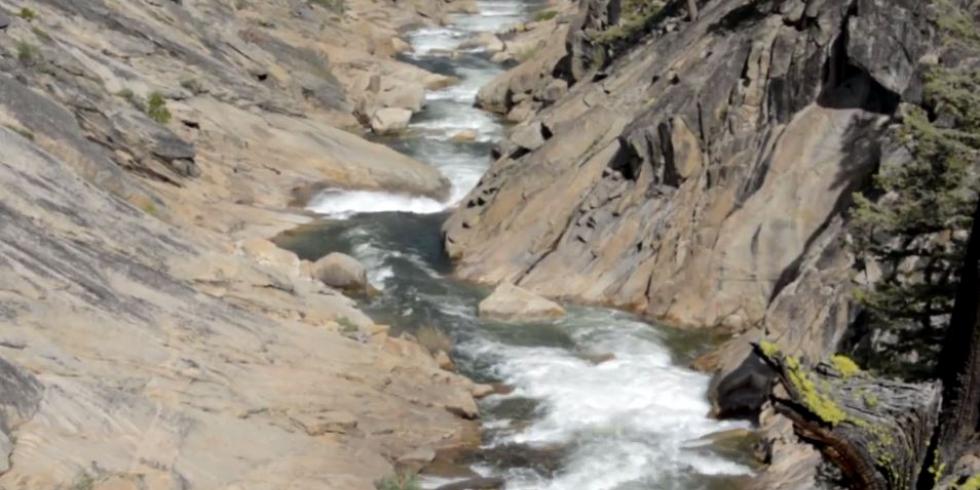
love that view!
After that the river follows with a 20 foot slide. Then you have the “Tobogan” wich is a super steep and fun 60 footer slide where you always get mad speed!
The final drop you can run it in 3 different places, straight and tight 40 footer on the right , or the main line in the middle wich has a really fun entrance into the drop, all of them are good to go but be aware of sticky holes at the bottom, might be a good place to hold on your paddle at high flows. After the last waterfall the river gets way bigger because of an affluent coming from the right.
Mattie B the boss slaying shots with his Red cam !! A 40 thousand dollars camera can you imagine losing that thing???
Reposted from the Dagger blog, written by Chris Gragtmans
The past two years of extreme kayaking have been absolutely crazy to witness. From Tyler Bradt running 186 foot Palouse Falls, to a ridiculous season this year in Chile, to some serious progression on the Oregon and Cali fronts, the sport of kayaking has been pushed by a lot of people. The simple fact is that more people than ever before are running gigantic waterfalls.
One of the keys to stepping up your game on the big drops is having a plan B. One of the most important things that any creekboater should learn is how to brace for a dangerous flat impact. This can occur from a bad bounce on a slide or from landing flat in green water off of drops that are above a certain height. People have broken their backs on 20 footers… you need to be careful.
When all else fails, the technique that I would recommend is referred to as Hinge Theory within my circle of friends, although I am not sure if that is a commonplace term elsewhere. Basically, you need to think of your back as a giant hinge. If you sit up straight and fall like a sitting duck, your lower vertebrae can compress and/or fracture. The idea is to lean far forward instead, so that you slam your body (and sometimes nose, unfortunately) against your boat. Your back therefore pivots like a hinge and doesn’t break. Surf on down the Dagger blog for Pat Keller's first D of Linville Falls, where he put this technique to good use.
There are two types of hinges that I use on a regular basis:
Hinge #1 - General Purpose Brace for Impact
Place paddle on or very close to your deck between your knees and stomach
Flick elbows high
Lean aggressively forward
Bow your head with respect to the river
*This one is great for drops with flat rock landings. Combine with a dropped bow to glance off flat rocks. Learn this if you ever paddle the Horsepasture in NC*
Hinge #2 - Sheer and Utter Panic
Punch paddle and both hands straight out forward
Lean forward as far as you can
Bow your head
This one may very well sacrifice your nose, but that heals faster than your back.
There is one very important thing to note here. The hinge needs to pivot from the bottom of your spine and your hips, rather than just slouching and rolling your back. Keep your back as straight as possible. See the images below.
Slouching - Don't do it!
Hinging
Credit: Trent Thibodeaux
Credit: Jakob Kafer
I hope that this has been helpful. Be safe out there and good lines!
Reposted from the Dagger blog, written by Chris Gragtmans
I figured I would start things out by sharing some thoughts on the Green Boat. I contributed a bit of insight to Pat, Andrew, and Snowy during the design process of this boat, and I can now say that it is my favourite kayak to paddle, bar none. People often say, "why are you always paddling that thing, there's no races coming up?" My answer is simply that it is the most fun, dynamic boat I've ever tried. Now that the playing field is leveled, and everyone that wants it can have this ultimate extreme race machine, here's a couple of tips on how to paddle the Green Boat well:
Always have an active blade in the water.
The Green Boat doesn't like to be floated. You need to be skipping, planing, boofing, and carving down the river. You'll be able to boof up and over more stuff and punch bigger holes than you ever have before.
Giving it everything in the 2008 Green Race.
Photo: Seth Richardson
Experiment with seat and backband position.
All the way forward is not always the best position. I like the backband in my Green Boat to be pretty far back, to facilitate easier turning and corrections when boils and weird currents start to grab my bow.
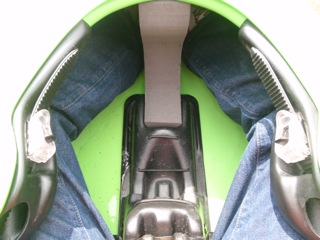
Make sure the boat is snug.
The bulkhead should be set up in a way that it holds your body against the backband tight enough so that it is difficult to slouch and sit back. Racing(or everyday paddling) will be much more effective and fun if you are sitting comfortably in an aggressive position.
Get in shape.
The Green Boat is the most maneuverable long boat that you can find, but it is still 11+ feet of kayak to boss around in whitewater. You'll enjoy huge rewards in paddling performance the more muscle you have to keep that thing going where you want it to.
Go into drops slow, come out of them fast.
The Green Boat is unbelievably fast coming out of rapids. I always try to focus on getting my line smooth into the rapid, and leaning back just a bit to plane out of them at maximum speed.
Russell Fork Race 2008... happy that my kayak is keeping me safely on the surface.
Photo: Rob Hurst
Have fun!
Enjoy cutting minutes off your local run descent times, storing ridiculous amounts of overnight gear, planing so fast out of slides and across eddy lines you're keeping the front 4 feet of your boat dry, and boofing drops so big that the entire boat comes clear of the veil.
Reposted from the Dagger blog, written by Christie Glissmeyer
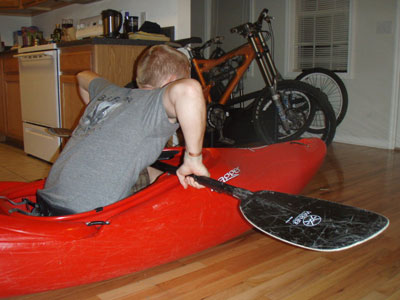
It can be very frustrating when you are out on a wave or in a hole and you are sliding around or falling out of your playboat every time you throw a move. On the other hand, if your outfitting is too tight you won't be able to stay in your boat for more than a few rides. Outfitting a new boat can be a drag sometimes but here are a few ideas to get started:
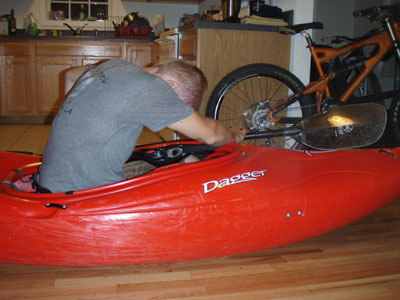
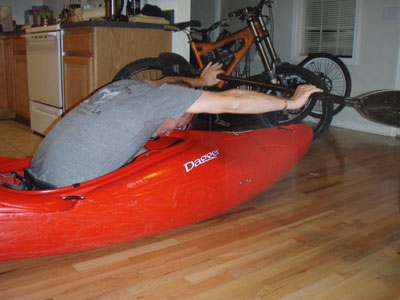
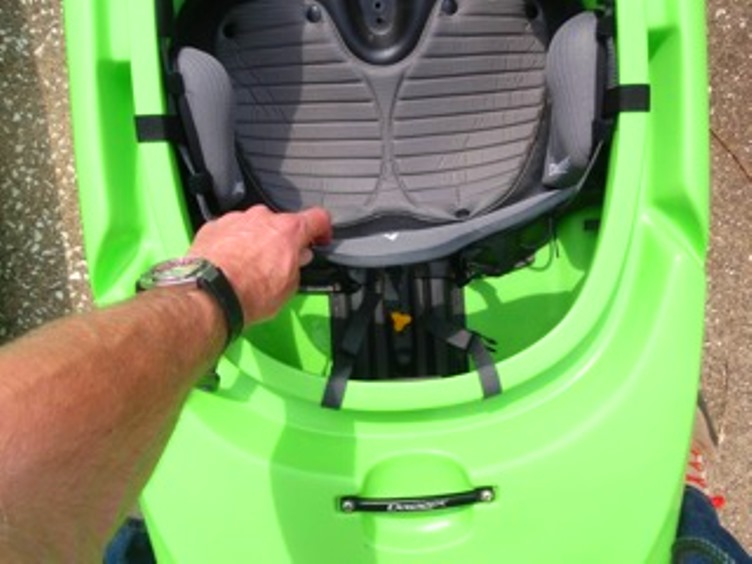
Moving the seat as far forward as possible is helpful if you are having any problems with bow initiations. The backband should be snug to give you lower back support. Hip pads should be snug but not too tight.
If you are a smaller person it helps to glue 1/2-1 inch of foam on the seat and where the knee caps rest in the knee braces. Not only is the extra padding more comfortable, but by sitting higher your knees can rest better in the knees braces, your elbows clear the cockpit and you will have more leverage.
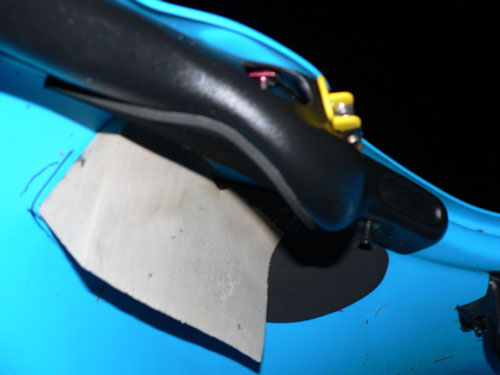
I cut one square foam block and glue it in the bow for my heels to push off of. I've found that if my toes danging free it helps to keep my feet from cramping up or falling asleep.
Triangle foam blocks glued to the underside of the knee will also ensure that your knees won't fall out of the knee braces while you are doing inverted tricks or rolling
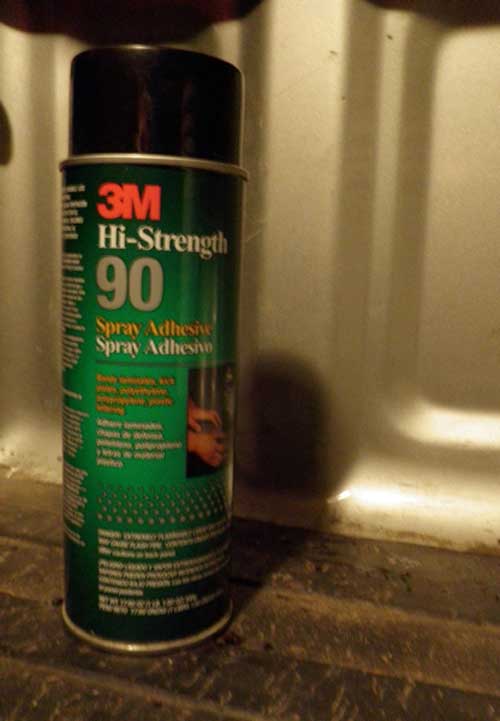
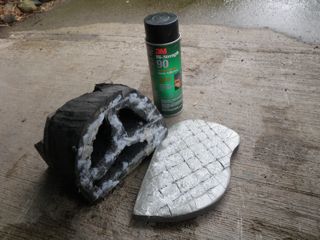
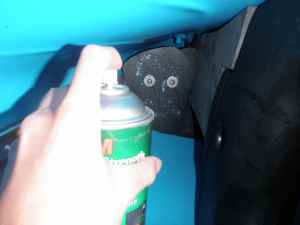
The glue I like to use is 3M spray contact cement (found at hardware stores) because it dries in just about 15 min. Just make sure you get the non-water soluble kind in the green can. Spray both surfaces you want to bond, let sit for about 5 minutes and then stick together.
Reposted from the Dagger blog, written by Christie Glissmeyer
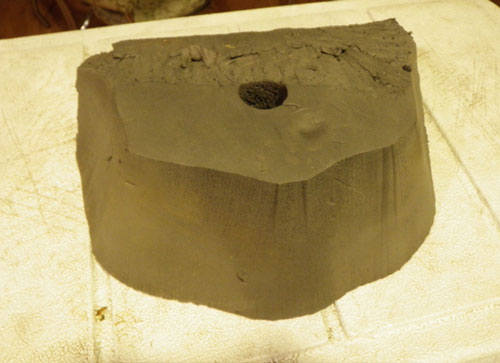
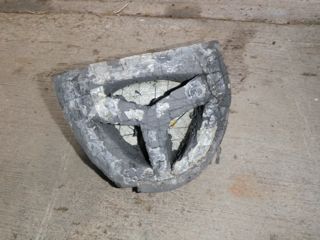
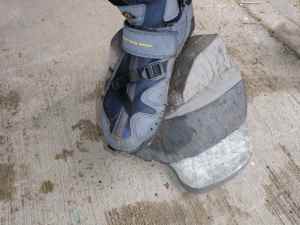
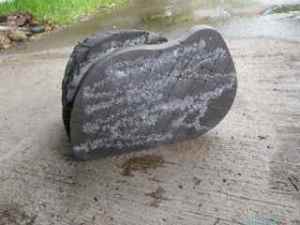
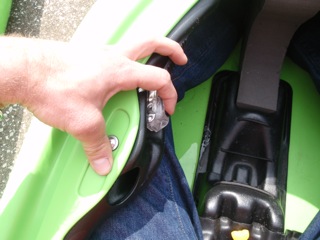
Piton risk increases this time of year as river levels drop and more nasty rocks are exposed. One method to avoiding ankle injuries is to cushion your bulk head with extra foam. I learned this outfitting technique from Pat Keller and I have walked away from some really, really bad pitons.
Many creek boats come with extra foam blocks for cushioning your bulk head. If not, pick up a couple blocks of mini-cell closed cell foam about 4-6 inches thick.
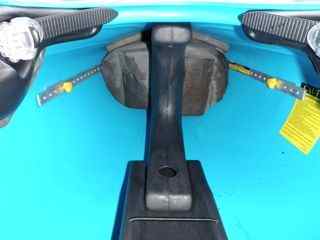
Trace the shape of your bulk head and cut out two base blocks.
Cut a few holes straight through the blocks from top to bottom. Now they will look similar to swiss cheese and will have a nice spongy cushioning effect when you put pressure on them.
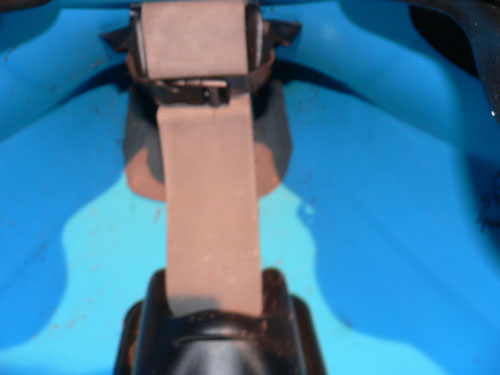
Shape a 1-inch thick foam sheet to cover the block and attach with adhesive. (I like to use 3-M spray adhesive for gluing foam because it dries quickly and isn't messy to work with. Just make sure you get the waterproof kind.) It also helps to score both foam surfaces with a knife before you apply the adhesive. Wait for at least 3 minutes after you apply the glue before attaching the two pieces. The glue will start to get tacky after a few minutes and make a solid bond.
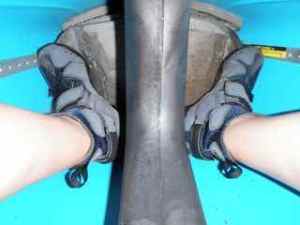
I like to push off the blocks with my heels instead of my toes. This keeps my feet from falling asleep. To do this I make a wedge block and attach it to the base block. Make it just big enough that your toes can still rest on the base block.
Attach the wedge to the block, again by scoring both surfaces with a knife and spraying with adhesive.
Now score the back side of the core blocks. Spray that surface and the bulkhead with adhesive. Again, wait a few minutes before bonding the blocks to the bulkhead.
Now when the glue dries you can go paddling and try not to run into anything . . . but if you do it shouldn't hurt as much :)
Reposted from the Dagger blog, written by Andrew Holcombe
With spring right around the corner here in the southeast and rain in the forecast I thought I’d share a bit about outfitting your Dagger kayak. The great thing about Dagger’s outfitting is that it strikes a nice balance of being functional but still very easy to adjust and set up. To outfit my new boat in its entirety usually takes me between 10-20 minutes and then I have a boat that’s fully customized to me. We’ll take this in stages starting with:
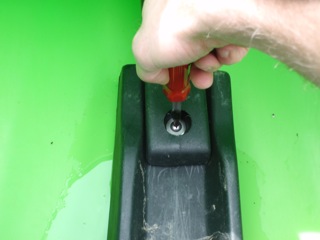
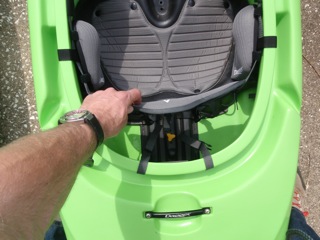
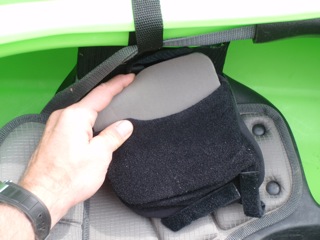
Seat
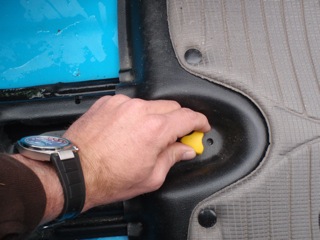
Dagger makes two types of seats. The first is the play seat which comes in the Agent, Axiom, and Mamba (unless you special order the creek seat in the Mamba). This seat is very easy to adjust, simply unscrew the yellow wingnuts at the front and back of the seat, lift up, and the seat will slide forward and back (remember to screw the wingnuts back on).
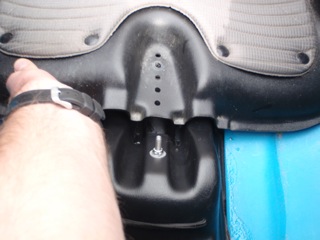
If you are unsure of where to put your seat start in the middle and then adjust from there as you paddle your kayak. Don’t be afraid to change your seat position around, sometimes it takes a bit to find the best one for you. Also in your outfitting kit you’ll notice a plastic wedge with a bolt coming out the top. This is a seat raiser, used to help hold your legs into the thighbraces. To use it just lift the front of the seat up and slide it under the bottom, remembering to screw the yellow wingnut back onto the bolt.
I highly recommend trying this, it provides better control and comfort.
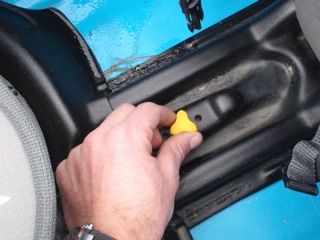
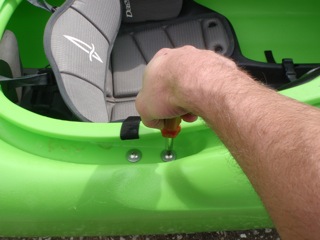
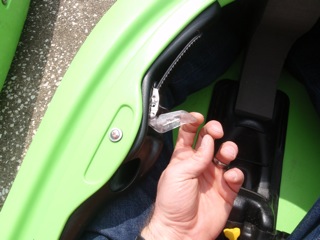
The creek seat, due to its sturdiness, takes just a bit more time to move. For this reason I usually paddle my Nomad or Mamba a bit before moving the seat (in other words make sure you need to before you do it). First you want to completely unscrew the bolt that connects the front of the seat to the center pillar (take care not to lose it the center wall cavity).
Second loosen but do not completely unscrew the bolts on the sides of the cockpit (these connect the seat to the boat).
Before moving the seat knock the bolts back down flush with the boat by hitting the top of your screwdriver with your palm.
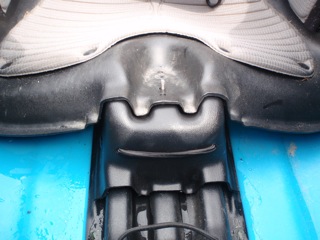
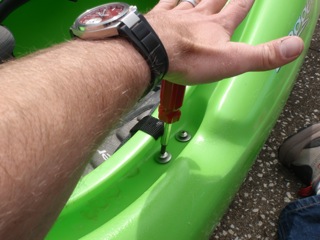
Move the seat to the desired location, keeping in mind to line the front of the seat up with the pre-existing recessed nuts. Retighten and bolt everything.
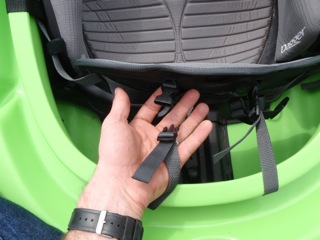
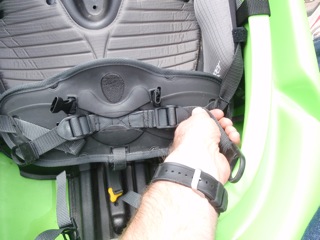
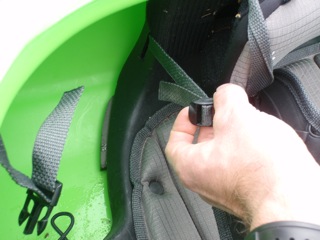
Backband
Start by unbuckling the straps that attach the back of the backband to the cockpit in order to allow the full range of movement while adjusting.
Next position the rachet system so that it’s near but not at the front of the teeth. Now reach behind the backband and pull on the plastic tabs on either side.
This will move the backband forward, stop when the backband is centered over the back of the seat.
At this point you can re-buckle the straps that attach the backband to the back of the cockpit. You don’t need to make these super tight, allow a little slack. Now sit in your boat and use the ratchets to move the backband forward into a comfortable position. You want the ratchet to be about half way down the teeth when you have the backband where you want it.
If its too far forward or back adjust on the back of the backband accordingly. All set, to get out just release the ratchets.
At this point you no longer have to use the adjustment behind the seat, you can get all the movement you need from the ratchets.
Now pull the hippad off of the Velcro and add foam shims to the pocket on the back until you reach the desired thickness.
Re-velcro and pull the attachment strap tight. One note, as you re-velcro make sure that you locate the hippads high enough so that the bump on the front is on top of your thigh and in front of your hip. This will help keep your legs from falling asleep.
My Brother Jim and I hatched a plan last year while hiking into the middle kings to take a leave from work and travel to the places we have always wanted to paddle. I was so excited this spring to team up with Dagger as our primary sponsor of our amazing trip. We are planning to paddle in the Western US and Canada for the summer then head to Peru and Nepal in the fall and early winter.
The trip stated with a bang and Jim and I drove from Colorado through the night after my last day of work to meet with Rolf Kelly and Jared Johnson the paddle Dinkey Creek. We didn't put on until 5:30pm but we knew the run well and were able to make it to camp by 7:30, the next day was a great reminder of why we came to California big clean whitewater with amazing weather.
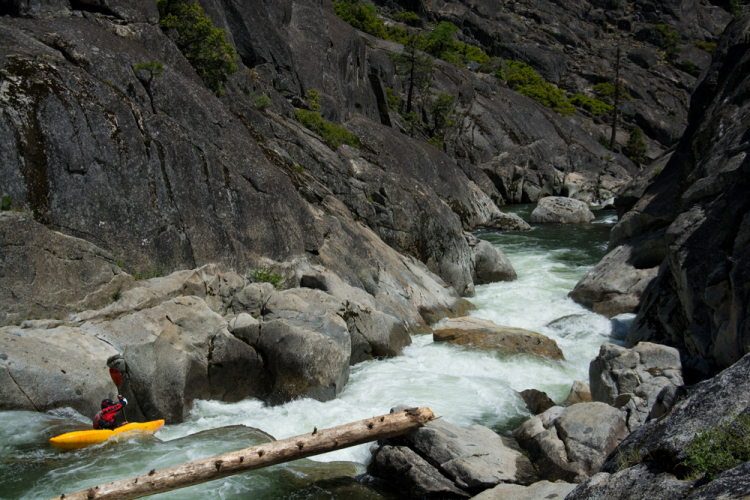
Next we headed south to three rivers, fellow Team Dagger paddler Darin Mcquoid has been showing us his local runs, have been able to get on 4 different stretches of river that have all been amazing. The highlight has been the upper middle fork that has only seen a few descents last being Darin and Ben Stooksberry and few years back. The river contains great whitewater in an tight gorge, we had a great day with smiles on all our faces.
Thanks again to Dagger for the support on our dream project. Enjoy the pics below and keep and eye out for video of these runs.
Darin Finishing off a super gorged out rapid
Me Dropping into "Rusty's Rampage", there is an eddy at the bottom left that took me 5 attempts to make it out
For more pictures and more details head over to our blog.
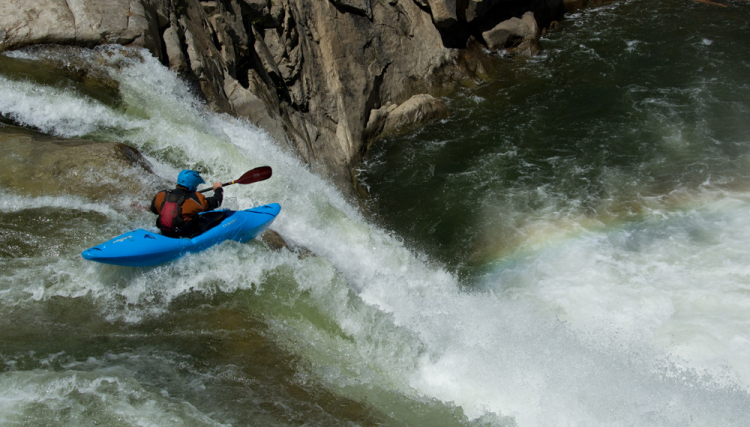
Fantasy Falls is arguably the best multiday run in California (which says a lot), it has no hike in and has about every kind of rapid you could ask for all in an amazing wilderness setting.
Jim and I were lucky enough to get 3 separate runs in on fantasy falls this summer all at a variety of different water levels. The camping is amazing and the rapids are incredibly good and if you want to you can go HUGE on this run. Enjoy the pics and video below and check out this blog post.
Sam Grafton on and early drop
Sam Cheasly on the mushroom boof
Great camping
Me dropping into the riflemans gorge on our low water trip
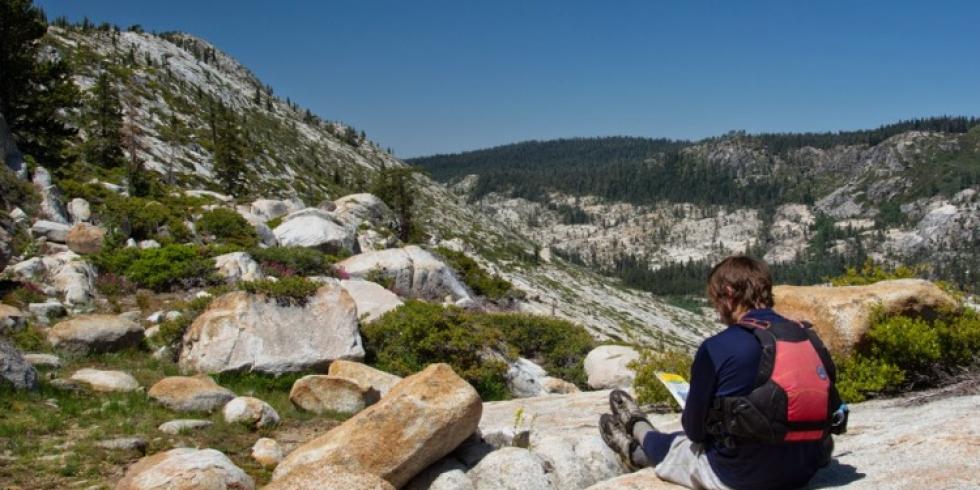
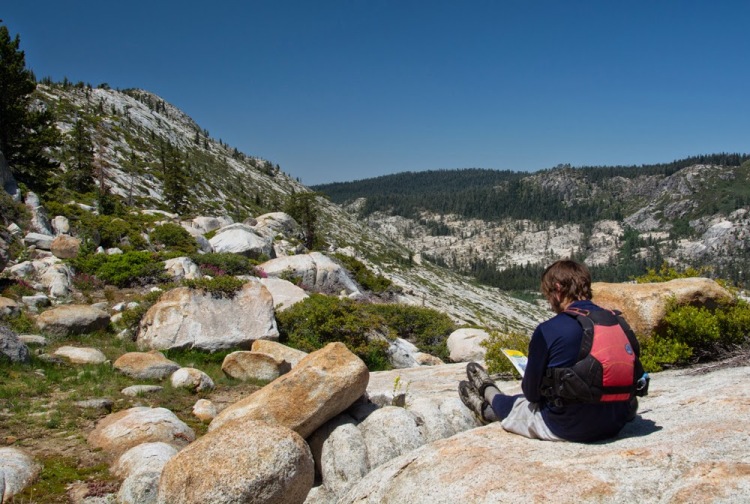
This year while planning for our two month cali season one thing that was a disappointment was that we were told "upper cherry is closed this year". The reason behind the "closure" was the rim fire in the fall of 2013, closing access to the cherry lake and the normal hike in and take out to the famous run. Lucky for me my brother Jim doesn't take no for an answer and found a legal access to the creek.
We hiked in from the normal west cherry hike in at bourland meadows and over into the upper cherry drainage a few miles below the normal putin (totally 4.5 hours). Our hike out was the bad part, we hiked out from the west cherry confluence all the way back to our hike in spot (7 hours in brutal heat=not fun, but great middle kings training).
Our reward was to have the whole creek to ourselves at a great flow, with the popularity of upper cherry it is a rare instance to see no one.
Overall I will probably do the west cherry hike in normally and take out at the lake. For more of a write up check out jim's very in depth blogpost.
Jim checking out the map on the ridge between west cherry and upper cherry, this is looking back into west cherry and to the start of our hike high on the opposite ridge
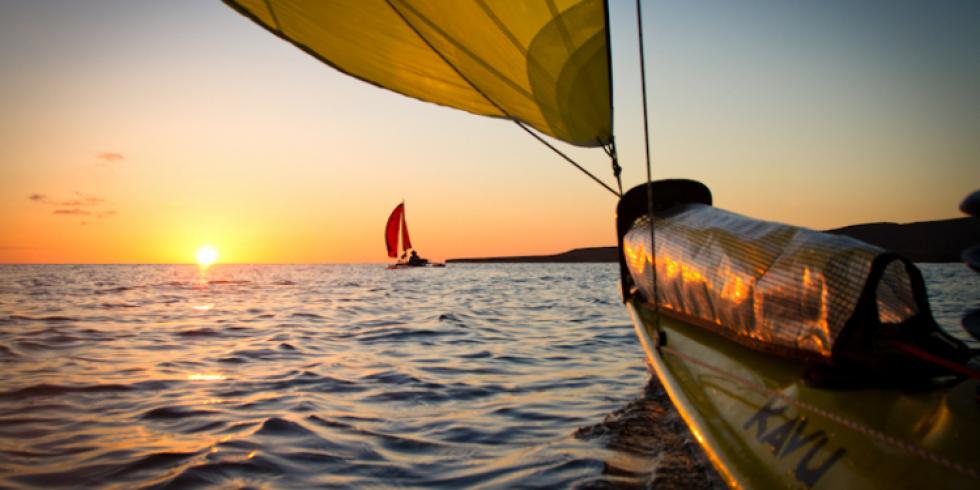
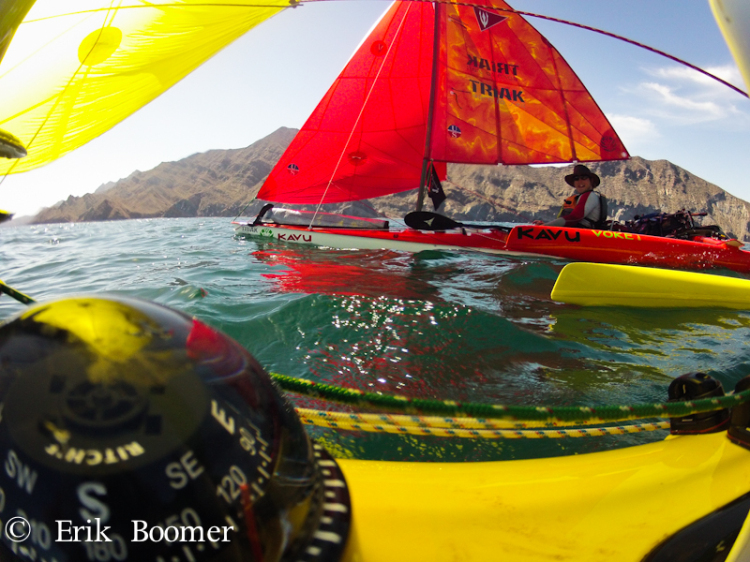
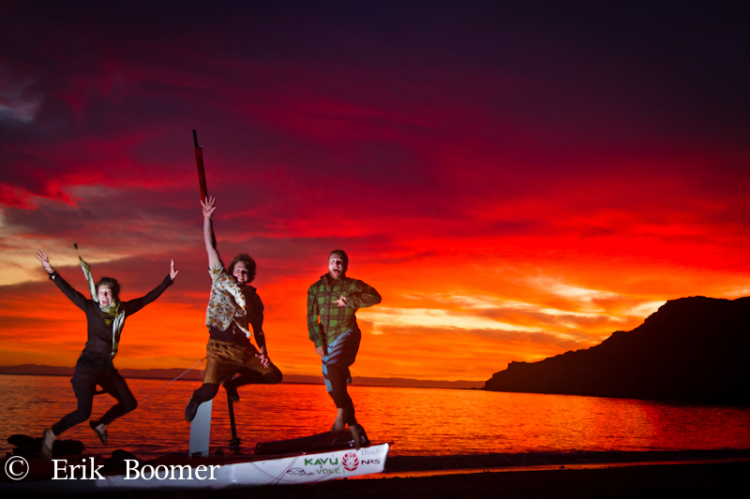
As the snow began to fly in the Northwest I loaded up in my trusty Ford Ranger and pointed it South. I picked up the rest of the team Erik Boomer and Sarah Mcnair-Laundry in LA and continued on.
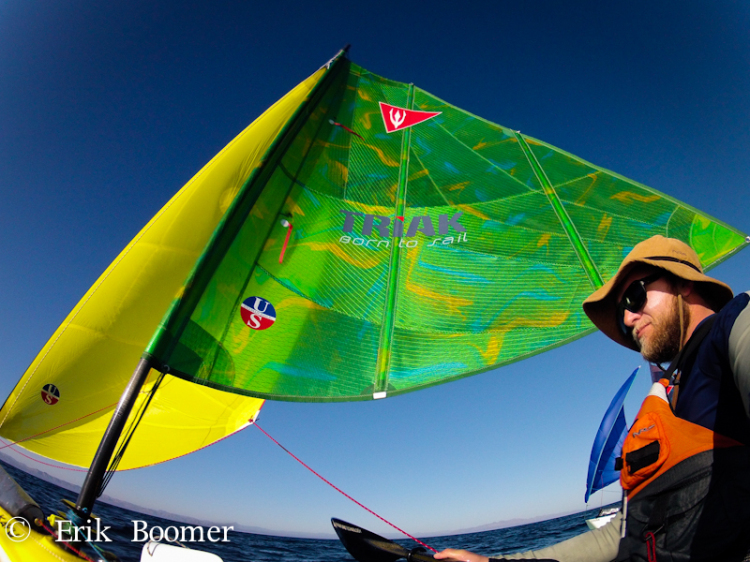
Our destination was Mexico. This mission was to be a little different than most. Instead of plugging off big waterfalls we we're attempting to do a seldom done crossing of the Sea of Cortez then continue descending a 300 mile long remote section of Baja Peninsula. Our crafts of choice were Triak's, essentially sea kayaks rigged to sail. We anticipated that the common Northerly winds would blow us along for a good portion of the journey and in any other conditions we would be able to paddle.
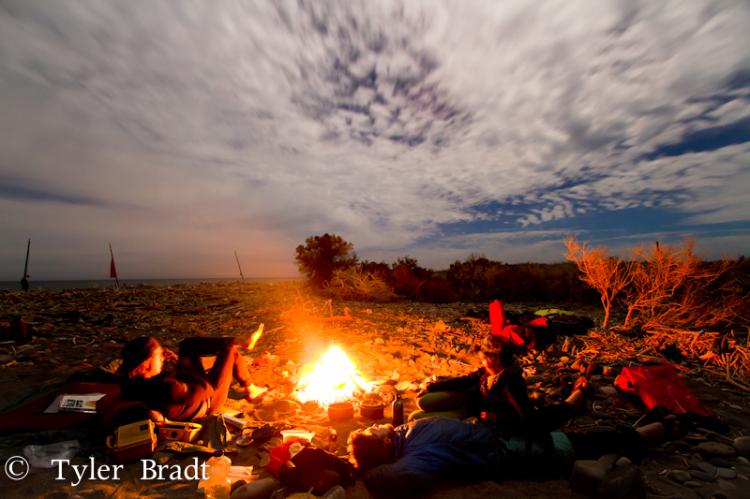
Once we hit the water the trip settled into that common comfortable pace of life that we live for. Disconnecting from the digital world and connecting to the real one. Waking up and going to sleep with the sun, making miles, anticipating weather, tides, and fishing for food - it was immediate clear why spend so much time and energy putting ourselves into these types of experiences.
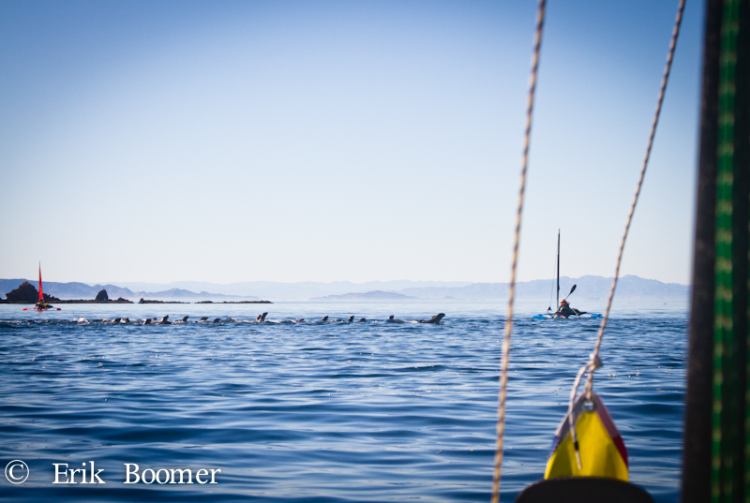
Along the way we're attacked by seals:
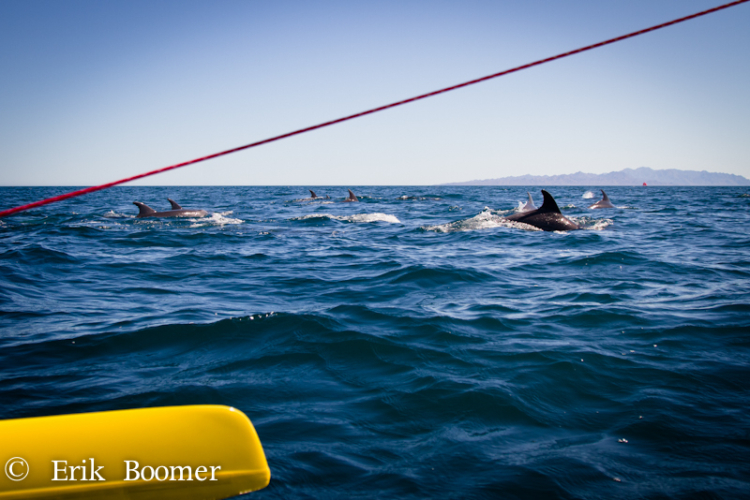
Paddled with dolphins:
Caught delicious fishes:
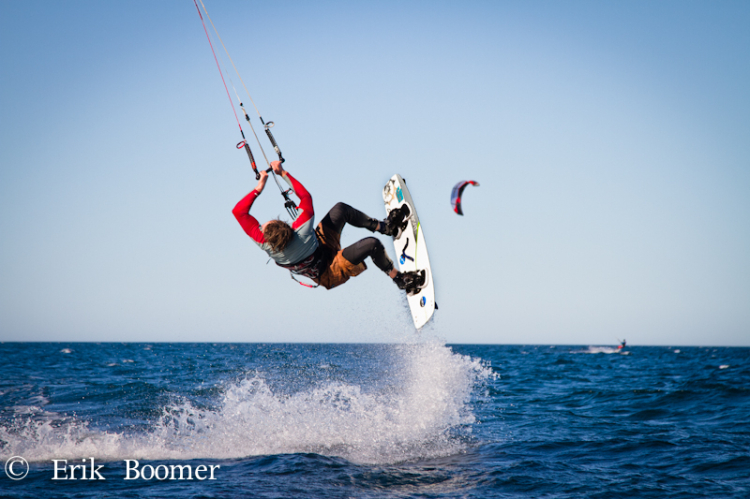
Got in some sick kiting:
Checked out some unreal sunsets:
And watched a lot campfires burn down
The expedition covered about 400 miles over the course of 25 days - the many stories will be told in full soon the short film which will be coming out in the next couple of moths.